Home > Pruning shade trees > Pruning cuts > Large removal cut
Making a large removal cut
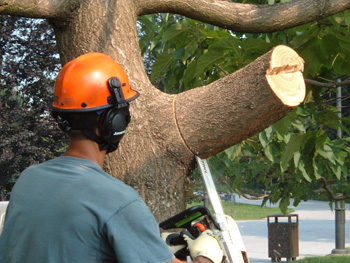
Making a large removal cut begins with an undercut and then a second cut on top of the limb (shown at the end of the limb). The final cut which is almost finished in the photo above cuts just outside the collar and branch bark ridge if present. If not present (as in this photo) then make the cut through the limb at a point that results in the smallest wound size.
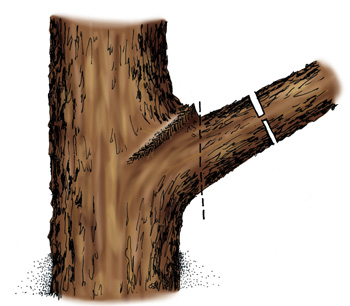
On larger limbs, arborists have found that the chain saw binds less and is more controllable when the top cut is made directly above the undercut.
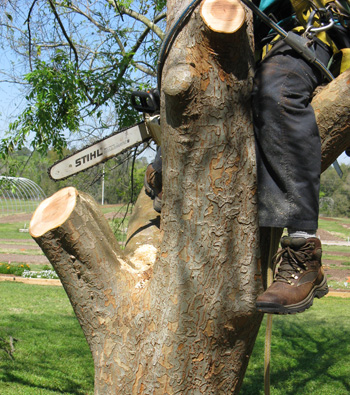
Some arborists consider leaving a stub on large diameter limbs such as the stub on the left shown above. The theory is that the limb will die back to a natural point and a collar then develops; follow up pruning then cuts through the limb just beyond the collar. The limb may also sprout and remain technically alive. A collar may begin developing around the base of the cut limb. While collar tissue may form, the wood formed prior to the pruning cut has no branch protection zone so there is little other than xylem plugging that retards the spread of decay back into the trunk.
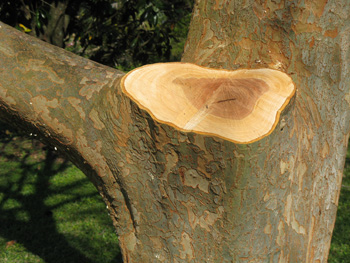
Most arborists cut large diameter branches back to the trunk. Although this leaves a large pruning cut on the trunk it is currently best management practice in most of arboriculture. Future research may clear this up.
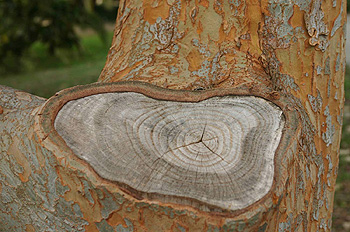
Some closure almost two years following removal cut on the tree shown above.
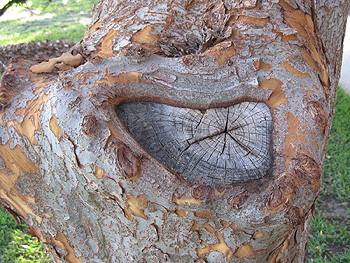
Considerable closure 4 years after making the pruning cut can hide considerable decay. Notice the deep cracks in the pruning cut surface indicating dead wood.