Home > Pruning shade trees > Pruning cuts
Pruning cuts
Photo examples of removal cuts
View animated removal cuts
Printer friendly page (pdf)
There are four different pruning cut types:
1. Removal cut (shown at right): large removal cut, do not make flush cuts
2. Reduction cut
3.
Heading cut
4. Removing dead branches
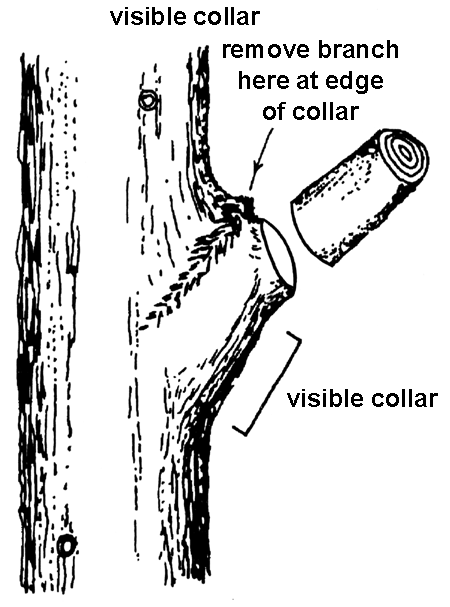
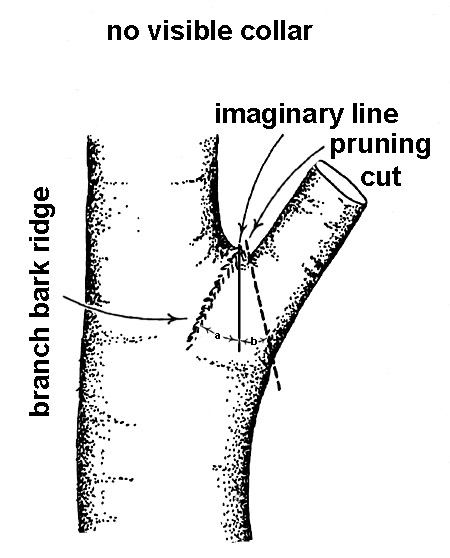
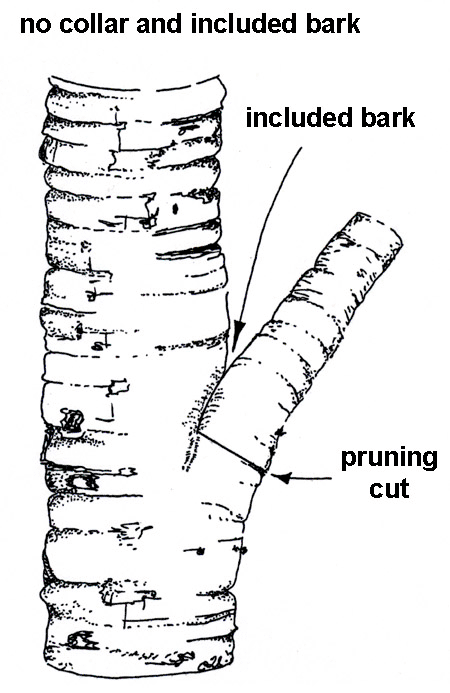
 There are three possible situations trees present to you when removing branches (shown at right). 1. Cut to the edge of the collar when one is visible (upper illustration). 2. If there is no visible collar, begin where the top of the branch makes an abrupt turn toward the trunk and cut outside an imaginary line drawn parallel to the trunk (center). 3. Make the final pruning cut at the base of the actual connection between the branch and trunk when there is included bark in the union (lower illustration).
There is no need to apply paints, wound dressings, or chemical formulations of any type to the surface of the cut. None of them help prevent decay; only appropriate pruning helps prevent decay. Some can protect the cut from becoming infected with canker fungi and some reportedly reduce the likelihood of infection from oak wilt.
See: nursery pruning cut examples.


